How to setup remote access to home server using Tailscale
// Written by Arjun Komath
// Fri, Jan 14 2022
In this tutorial, we’re going to set up secure remote access to our home servers/lab via the internet without using a static IP or Dynamic DNS with the help of Tailscale. We will need two things to make this work:
-
a home server or servers, which you probably already have
-
a free Tailscale account, you can create it here https://tailscale.com
Before we start, what is Tailscale?
Tailscale is a VPN service that makes the devices and applications you own accessible anywhere in the world, securely and effortlessly. It enables encrypted point-to-point connections using the open-source WireGuard protocol, which means only devices on your private network can communicate with each other.
Step 1: Install Tailscale
We plan to create a private secure network between our machines and the Tailscale client will facilitate that for us. So we’ll start by installing the client on our home lab server and on all the machines from which we’ll be accessing the server remotely. You can find the instructions here, https://tailscale.com/download
On Linux machines, you can just run this script
curl -fsSL https://tailscale.com/install.sh | sh
Once the installation has been completed you can test the network by checking its status using Tailscale. Run the following command:
tailscale status

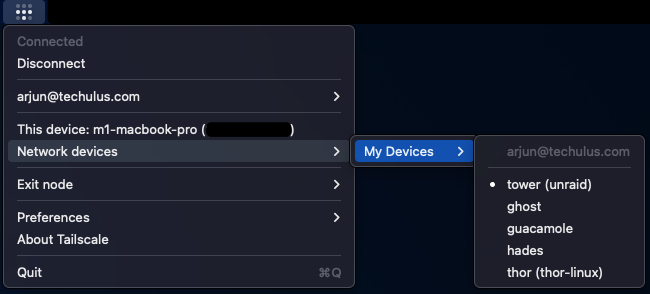
On Mac you can find the devices using Tailscale app:
You can also try pinging a device using:
tailscale ping ip|name

And that’s pretty much it, you’ve successfully set up networking between your devices. But we can do a few more things to make this setup nicer.
Step 2: Rename your devices and enable MagicDNS (optional)
Why? MagicDNS automatically registers DNS names for devices in your network, its a very nice feature that lets us address these machines via DNS names.
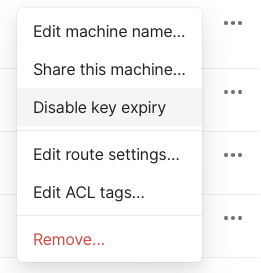
Go to your list of machines on the Tailscale dashboard and give them nice names as this will become your DNS name while using MagicDNS. You can find rename option under the menu that comes up by clicking on the three dots next to your machine name.
Once you’ve done that do to the DNS tab in Tailscale and add global nameservers. In my case, I’m using Cloudflare 1.1.1.1, 1.0.0.1 instead of private nameservers. So depending on your situation add the appropriate IPs and once that is done you can enable MagicDNS. You can test it by simply opening the browser and trying:
http://your-machine-name:port
Step 3: Disable key expiry (optional)
By default, Tailscale authentication keys expire after a certain period and we’ve to reauthenticate the machines. This is fine with our devices which we interact with all the time but it is annoying to do the same on our server. To fix this you can disable key expiry on your server from the Tailscale dashboard. Note that when we do this the servers have a perpetual authentication, so anyone who has access to the server has access to your network.
In the next tutorial, I’ll discuss steps for setting up an actual domain name and making services public securely with the help of Tailscale ACL.